Windows 10 brings with it many improvements, from a new and improved Start Menu to Cortana. Unfortunately, there is one downside: the installation process of your printer or scanner! In this article, learn how to get your company’s Epson DX5000 printer up and running on Windows 10 in just a few steps!
Should you let your computer search for a scanner?
If you have a computer that is new or has never been used with a scanner before, you should let your computer search for a scanner. This will help to ensure that the scanner is installed correctly and no conflicts exist between the scanner and your computer.
If you are sure that you have the correct scanner and that there are no conflicts between it and your computer, you can install the scanner by following these steps:
1. Start by opening the Windows Start menu.
2. Click on “All Programs” (or just “Programs”).
3. Click on “Epson Scanner Installation.”
4. Follow the on-screen instructions to install the scanner.
How do you find a scanner in the Windows 10, Device Manager?
In this article, we will show you how to find and install your Epson DX scanner with Windows 10.
First, open the Windows 10, Device Manager, by pressing the Windows key + I key combination.
Next, click on the Printers and Scanners category.
If your Epson DX scanner is not listed in the Printers and Scanners category, then it likely doesn’t have a driver installed on your computer. You can download a driver from the Epson website. To do so, open the website and enter your product registration number or model number.
If you don’t have a product registration number or model number, you can use the scanning software’s manual to find out the information. Once you have found your device in the Device Manager, right-click on it and select “Update Driver.” You will then be prompted to select a driver from a list that appears. Select “Epson Scanner” from the list and follow the instructions that appear on the screen.
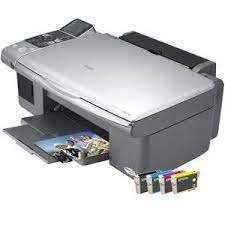
What is the Epson DX5000 Scanner?
The Epson DX5000 Scanner is a high-quality scanner that can be used with Windows. This scanner is great for scanning documents, photos, and other items.
Installing the Epson DX5000 Scanner on your computer can be a difficult process. This guide will help you install the scanner on your computer correctly.
Before you start the installation process, make sure that you have the correct software installed on your computer. The Epson DX5000 Scanner requires the Epson Scan Utility software to be installed in order to operate correctly.
Once you have the correct software installed, follow these steps to install the Epson DX5000 Scanner:
1. Open the Start menu and click on All Programs.
2. Click on Epson Scan Utility and then click on Install Epson DX5000 Driver.
3. Follow the instructions that are displayed onscreen.
4. Once the installation process is complete, you can start using the Epson DX5000 Scanner.
How to Install Your Epson DX5000 Scanner Using Windows 10 Device Manager
If you are looking for a way to install your Epson DX5000 scanner using Windows 10 device manager, then this tutorial is for you.
To begin, open Device Manager by pressing the Windows key + I. From Device Manager, click on the Printers and Scanners category.
Next, click on the name of your Epson DX5000 scanner and then click on the Properties button.
On the Scanner Properties window, you will need to provide information such as the device driver and scan settings. You can also specify whether or not you want to use the scanner with Windows 10 printing.
When you are finished setting up your scanner, click on the OK button to close the Scanner Properties window.
Now that your Epson DX5000 scanner is installed, be sure to take advantage of its features!
The Troubleshooting Guide for Installing Your Epson DX5000 Scanner with Windows 10
If you are having trouble installing your Epson DX5000 scanner with Windows 10, follow these steps:
1. Make sure that the printer is properly connected to your computer. If the printer is not properly connected, Windows10 may not be able to detect it.
2. Open the Device Manager by pressing “Windows + I” and then clicking “Device Manager.”
3. Right-click on the printer that you want to install and select “Update Driver.”
4. Click on the “Browse my computer for driver software” button and select the folder where you installed the driver for the Epson DX5000 scanner.
5. Click on the “Install” button and wait for the installation process to finish.